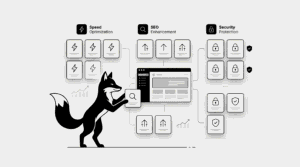




Where creativity meets psychology, design becomes a language of quiet emotion.
***
Building a high-performance WordPress site no longer requires bulky control panels. By leveraging Docker and Nginx Proxy Manager on a VPS, you gain total control over your environment.
This modern, containerized approach is exactly how professional agencies manage fast, scalable, and isolated WordPress instances.
In this guide, we will walk through the exact steps to deploy WordPress using Docker and secure it with a professional SSL-encrypted domain.
Why Use Docker for Your WordPress Site?
- Seamless deployment: Move your site between servers in minutes
- Total isolation: One site’s updates won’t break another’s environment
- Infrastructure as Code: Manage your entire stack with simple text files
- Perfect synergy: Integrates flawlessly with Nginx Proxy Manager for easy SSL
Prerequisites for This Setup
- A VPS (Ubuntu is the industry standard for Docker)
- Docker and Docker Compose installed on your server
- An active domain name pointed to your VPS IP
- Nginx Proxy Manager already running on your server
STEP 1 — Install the Docker Engine
If your server is fresh, you need to set up the core Docker engine first:
sudo apt update
sudo apt install docker.io -y
sudo systemctl enable docker
sudo systemctl start docker
sudo apt install docker.io -y
sudo systemctl enable docker
sudo systemctl start docker
STEP 2 — Install Docker Compose
Compose allows you to manage multiple containers (WordPress + Database) as a single service:
sudo apt install docker-compose -y
STEP 3 — Initialize Your WordPress Project Directory
Organization is key. Create a dedicated space for your project files:
mkdir wpfox && cd wpfox
STEP 4 — Create the docker-compose.yml Blueprint
This file defines how WordPress and your database interact. Open the editor:
nano docker-compose.yml
Paste this production-ready configuration:
version: ‘3.8’
services:
wpfox_app:
image: wordpress:latest
container_name: wpfox_app
ports:
– “8081:80”
environment:
WORDPRESS_DB_HOST: wpfox_db
WORDPRESS_DB_USER: wpfox
WORDPRESS_DB_PASSWORD: wpfox123
WORDPRESS_DB_NAME: wpfox
depends_on:
– wpfox_db
wpfox_db:
image: mysql:5.7
container_name: wpfox_db
restart: always
environment:
MYSQL_DATABASE: wpfox
MYSQL_USER: wpfox
MYSQL_PASSWORD: wpfox123
MYSQL_ROOT_PASSWORD: root123
volumes:
– db_data:/var/lib/mysql
volumes:
db_data:
STEP 5 — Launch Your Containers
It’s time to bring the site to life. Run the following command in “detached” mode:
docker compose up -d
Your WordPress instance is now accessible via your server’s IP:
http://YOUR-SERVER-IP:8081
STEP 6 — Map Your Domain via Nginx Proxy Manager
Login to your NPM dashboard and create a new “Proxy Host” with these details:
Domain: yourdomain.com
Forward Hostname: wpfox_app
Forward Port: 80
Scheme: http
Forward Hostname: wpfox_app
Forward Port: 80
Scheme: http
Pro Tip: Using the container name instead of an IP ensures internal communication stays secure within the Docker network.
STEP 7 — Secure Your Site with SSL
Never leave your site unencrypted. In the Nginx Proxy Manager SSL tab:
- Select “Request a new SSL Certificate” via Let’s Encrypt
- Check “Force SSL” for maximum security
- Agree to the Terms of Service and Save
STEP 8 — Finalize the WordPress Installation
Navigate to your domain in your browser:
https://yourdomain.com
Follow the on-screen WordPress wizard to choose your language, site title, and admin credentials.
Troubleshooting Common Roadblocks
- Seeing a 502 Bad Gateway? Double-check that NPM and WordPress share the same Docker network.
- Database connection errors? Verify that your MySQL credentials in the YAML file are identical for both services.
- Site won’t load? Use
docker psto confirm both containers are “Up”.
The Final Result
- A fully functional WordPress site running on your own VPS
- Complete isolation via the Docker container ecosystem
- A professional domain connection managed by Nginx Proxy Manager
- Full HTTPS encryption for better SEO and user trust
Learn More About WordPress Mastery
- The Ultimate Guide to Fixing 502 Bad Gateway in Docker
- How to Drastically Speed Up WordPress on a VPS
- Step-by-Step Nginx Proxy Manager Installation
✔ Congratulations! You have successfully deployed a modern, agency-grade WordPress setup on your VPS.
Share:
Tags