


Even under steel, the old forest murmurs. The earth hasn’t stopped dreaming of green. Time moves differently among still things. Moss teaches patience we’ve long forgotten.
***
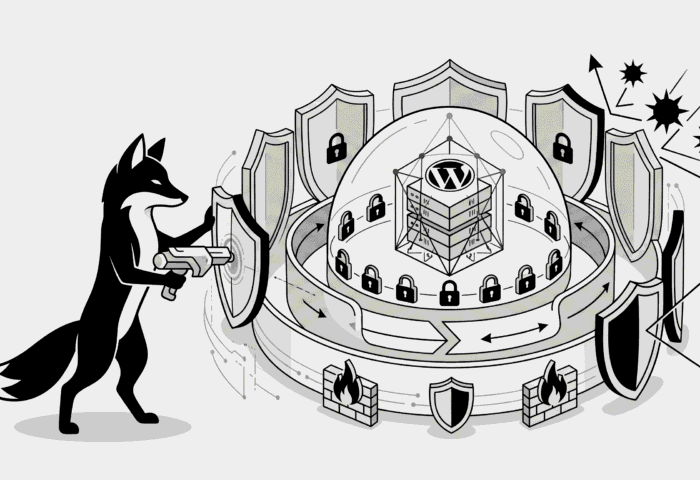
Running WordPress on a VPS using Docker and Nginx Proxy Manager gives you incredible power, but it also places the full responsibility of security in your hands.
By default, a fresh VPS is an open target for automated bots, brute-force scripts, and sophisticated attacks. In this guide, we’ll move through a professional-grade hardening process to shield your site at every level.
The Risk: Why Your VPS Setup is Targeted
Hackers don’t always target “you” specifically—they target common vulnerabilities in modern stacks. This includes:
- Leaving standard SSH ports wide open to brute-force attempts
- Failing to isolate internal Docker databases from the public internet
- Running an outdated OS without the latest security patches
- Leaving the default WordPress login page unprotected
STEP 1 — Patch Your Foundation (The OS)
Your security is only as strong as your host operating system. Start by ensuring every known vulnerability is patched:
sudo apt update && sudo apt upgrade -y
This installs the latest security updates for your kernel and system libraries.
STEP 2 — Lock the Gates with a UFW Firewall
A firewall is your first line of defense. It ensures that only traffic on specific “lanes” is allowed into your server. We only need SSH, HTTP, and HTTPS:
sudo ufw allow OpenSSH
sudo ufw allow 80
sudo ufw allow 443
sudo ufw enable
sudo ufw allow 80
sudo ufw allow 443
sudo ufw enable
Warning: Always ensure you allow SSH before enabling UFW, or you will lock yourself out of your own server!
STEP 3 — Isolate Your Docker Infrastructure
In a Docker setup, your database (MySQL) and your WordPress app talk to each other inside a private internal network. There is no reason for your database port (3306) to be open to the world.
- Run
docker psto see your active containers. - Check your
docker-compose.ymlfile. Ensure only the Nginx Proxy Manager (and maybe WordPress) has mapped ports. - The Rule: If it doesn’t need to be seen by the public, keep it off the port list.
STEP 4 — Harden the WordPress Entrance
Most WordPress hacks happen through the login page. You can stop these by installing a security suite like **Wordfence** or **iThemes Security** and enabling these key features:
- Two-Factor Authentication (2FA): Even if a hacker steals your password, they can’t get in without your phone.
- Rate Limiting: Automatically block IP addresses that fail to log in multiple times.
STEP 5 — Inject Nginx Security Headers
Nginx Proxy Manager can send “instructions” to browsers to help prevent XSS (Cross-Site Scripting) and clickjacking. In your Proxy Host advanced settings, add these headers:
add_header X-Frame-Options “SAMEORIGIN”;
add_header X-XSS-Protection “1; mode=block”;
add_header X-Content-Type-Options “nosniff”;
add_header Referrer-Policy “strict-origin-when-cross-origin”;
add_header X-XSS-Protection “1; mode=block”;
add_header X-Content-Type-Options “nosniff”;
add_header Referrer-Policy “strict-origin-when-cross-origin”;
STEP 6 — Enforce Strict File Permissions
If a hacker gains a foothold, you want to make sure they can’t write malicious code into your files. Access your container bash and run these commands to set standard, secure permissions:
find /var/www/html -type f -exec chmod 644 {} \;
find /var/www/html -type d -exec chmod 755 {} \;
find /var/www/html -type d -exec chmod 755 {} \;
STEP 7 — Shut Down the XML-RPC Backdoor
The xmlrpc.php file is an outdated feature often used by attackers to launch brute-force attacks. Block it entirely in Nginx Proxy Manager:
location = /xmlrpc.php {
deny all;
}
deny all;
}
The Final Result
- A hardened VPS that ignores “background noise” attacks
- Securely isolated Docker containers with no public database exposure
- A WordPress dashboard protected by 2FA and brute-force limits
- Modern security headers protecting your visitors’ browsers
Deepen Your Knowledge
- The Blueprint: Installing WordPress on VPS with Docker
- Fixing the 502 Bad Gateway: A Docker Troubleshooting Guide
- Tuning for Speed: Optimizing WordPress on VPS
- SSL Setup: Securing Traffic with Let’s Encrypt
✔ Your WordPress VPS is now a fortified fortress, ready to handle production traffic safely.
Share: